
How to Make your own Holiday Planter
I love my outdoor holiday planters, and I don’t know about you, but I’ve never been brave enough to make one. I was still deciding where to buy my holiday planters this year, when I happened to drive by a big sign for a “Make your Own Urn Workshop”.
Hmmm..
So I called, booked a spot in the next workshop, and much to my total surprise, in about an hour, I made pretty darn good planter if I do say so myself! I can’t take all the credit though, asI could not have done it without the workshop and great help from Mike and Cheri at the Caledonia Garden Centre.
Given a number of you have commented on earlier post about my holiday planter, I thought I would put together this quick step-by-step guide on how to make your own!
You will need:
- Flower Pot - big enough to stand alone or be inserted into decorative urn
- Potting Soil
- Green Floral Foam (aka Oasis)
- Chicken wire or mesh
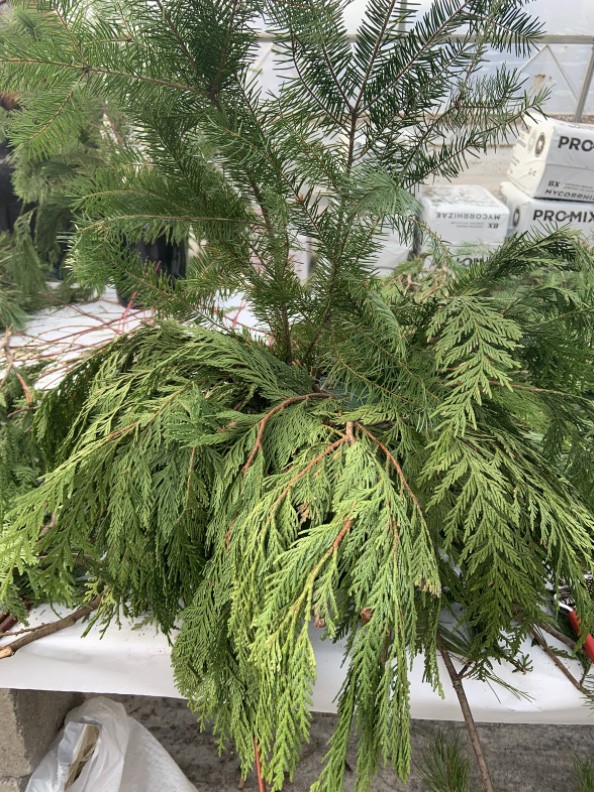
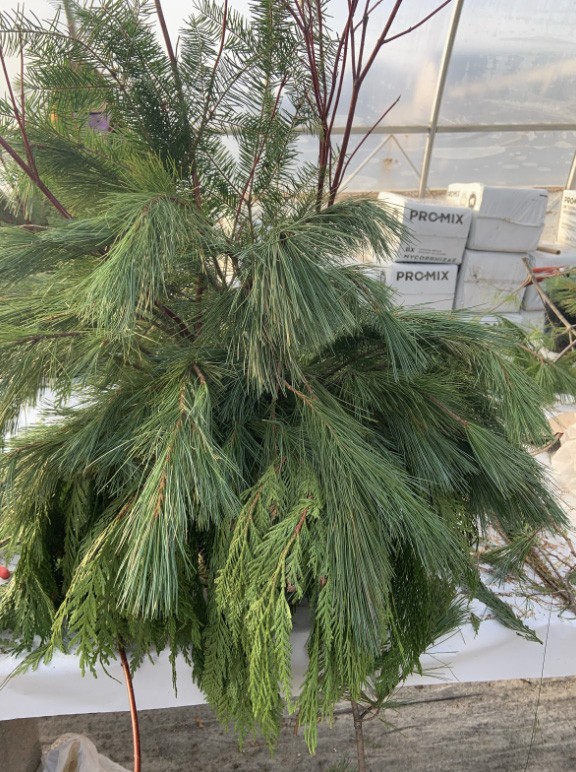
- 3 types of fresh greenery (one greenery such as cedar that hangs loosely to cover much of the pot, one tall rigid pine or spruce greenery for backdrop and one type of long needle pine for filling)
- Tall decorative twigs and/or birch
- Ornaments on sticks (or make your own with ornaments, floral wire, sticks and a glue gun)
- Ribbon or a bow
- Cutters
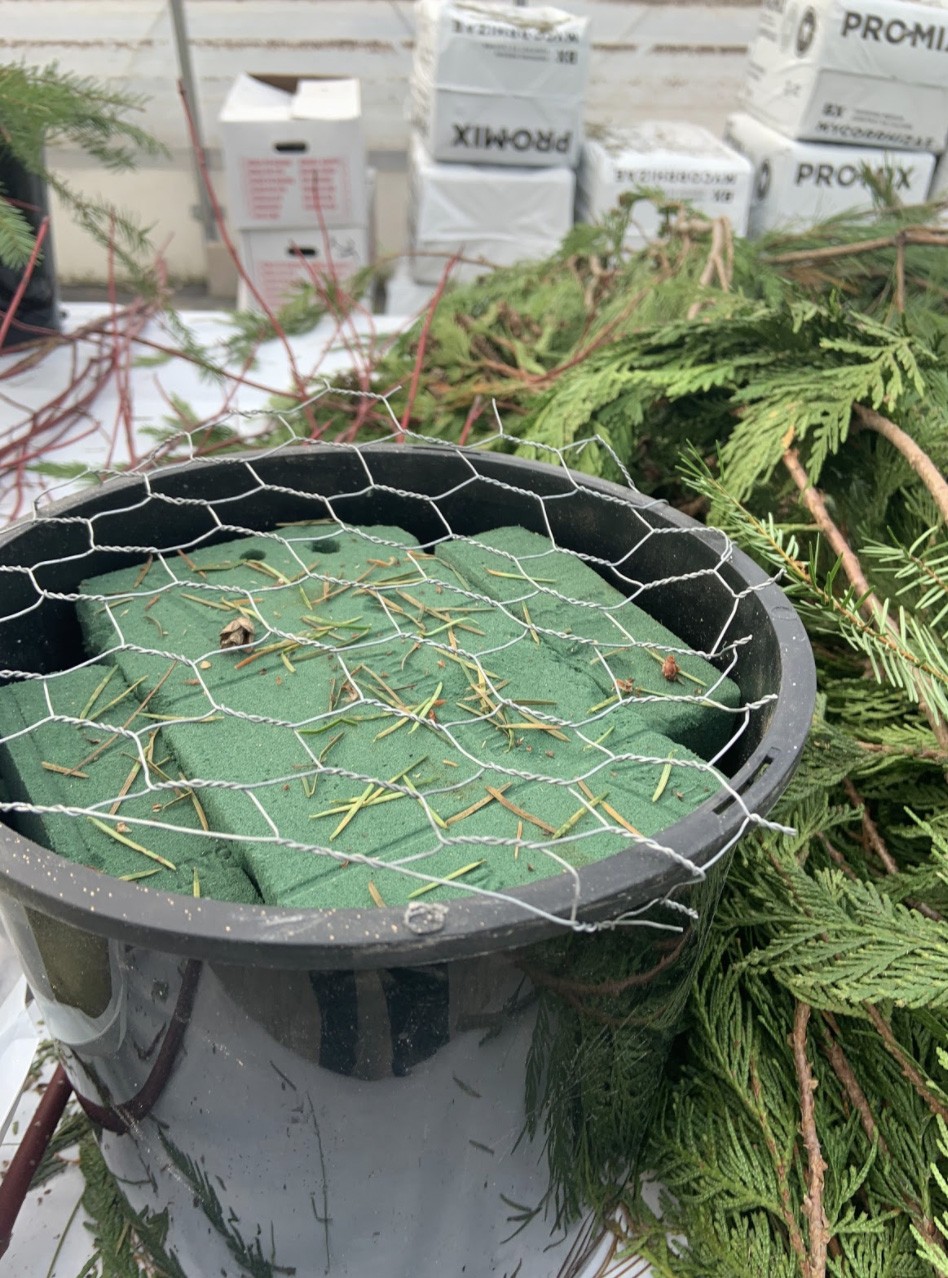 Step 1: Prepare the Container
- First, fill your flower pot with soil, about 4” from the top rim
- Cut and shape the floral oasis to cover the majority of the inside of the pot
- Cut a piece of wire mesh and place on top of the oasis to help hold the greens in place (If you don’t have the mesh, not to worry, it is possible without, however may not hold as well)
- Pour jug of water in the pot to wet the oasis and soil
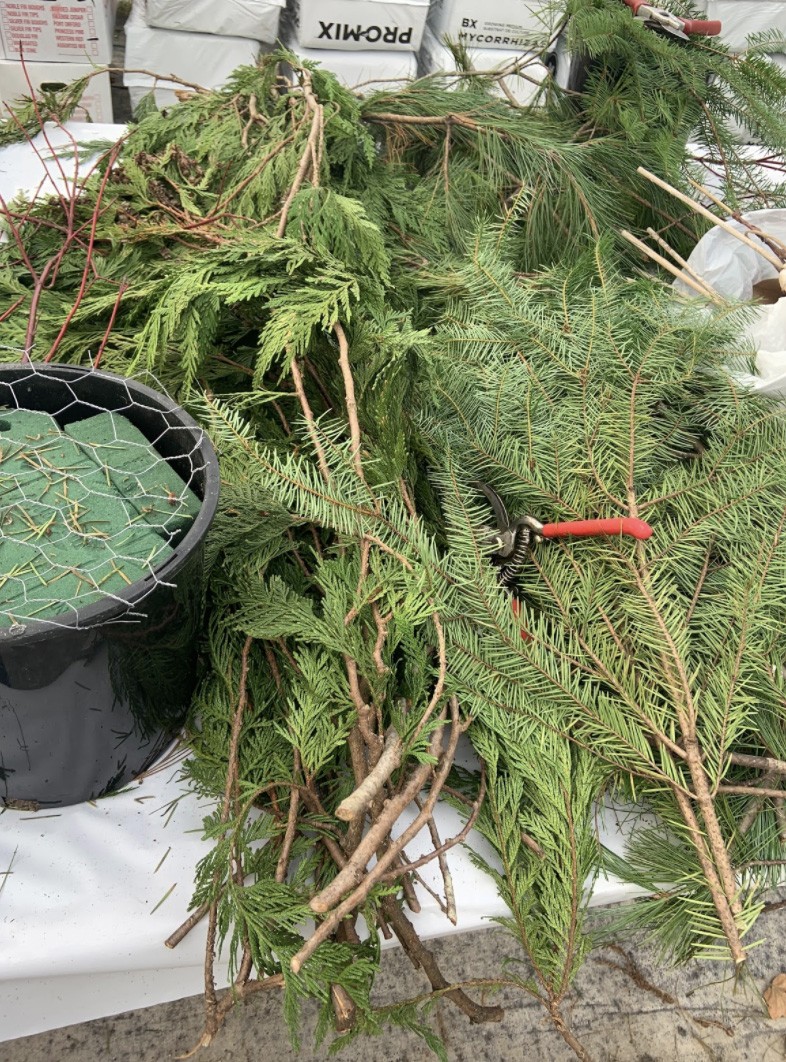 Step 2 - Prepare the Greenery
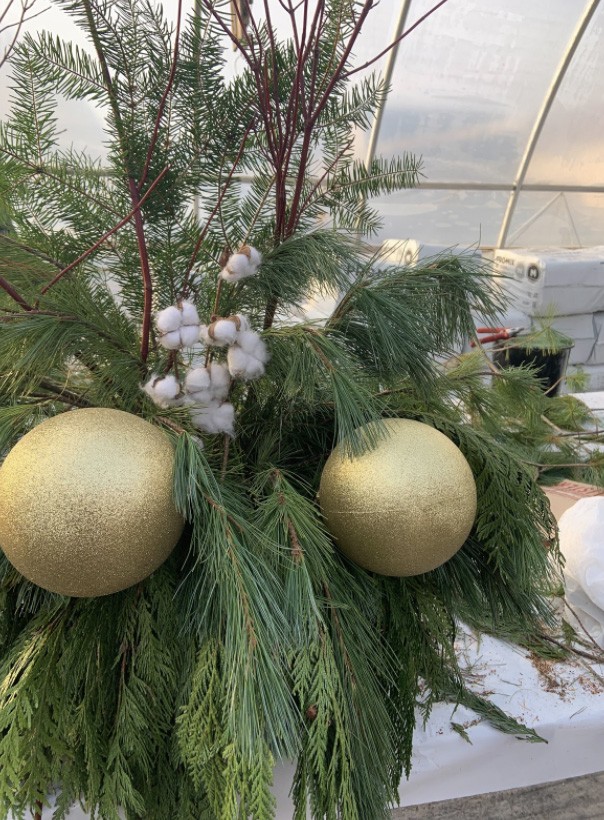
Set out your three types of greenery:
- One soft hanging cedar
- One tall rigid greenery that will create height
- One long needle greenery which will act as filler
- Separate the greens, and don’t be afraid to cut down some long pieces into small pieces now and throughout the project for easier placement
 Step 3: Placement of Greenery Base and Backdrop:
- Start with inserting the branch end of your soft cedar into the green oasis close to the outer rim of the pot.
- Continue placing cedar all around the entire rim of the pot. Think of it as creating a hula skirt of cedar around the outside rim of the planter.
- Next, insert a second type of green which is sturdy and tall and place them at the back section of the planter, like a peacock tail.
- You can also insert tall decorative twigs or birch at this time either in front or behind the peacock tail to create additional impact and height. Make sure these decorative twigs or birch you may add are minimum 12” above the top height of the peacock tail.
 Step 4: Placement of Greenery Continued - Filling in the Centre
- Now start to fill in the area in front of the peacock tail with your third type of long needle greenery. A thick and full pine or spruce with long needles looks nice and helps to fill the area
- Fill in the shape as if you are creating a shape like a basketball or dome. Be sure to cut the the long pieces of the greenery and create a few shorter pieces in similar length to to fill in the area
- No need to completely fill this area now, you can come back and add more later in between decorations
 Step 5: Start Adding Decorations
- Once the centre area of the pot is fairly full with long needle greenery, you can start inserting decorative items on wooden sticks into the green floral foam, staggering the placement of the decoration so each one is slightly higher or lower
- If you have an ornament you wish to use which is not on a stick, tie the ornament onto a floral stick with floral wire, and secure it with a little hot glue
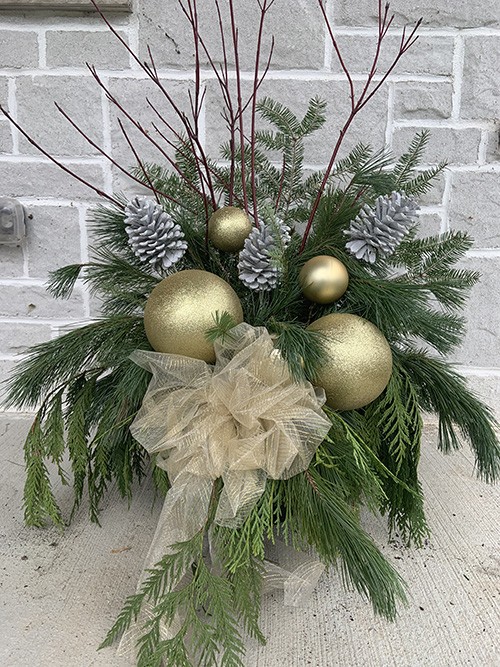 Step 6: Finishing Touches with Your planter
- Add some additional greenery after you have added your decorations to fill in any gaps.
- Finish your look with a coordinating bow and you have a beautiful planter!
- Give the pots a little water when you are done. Keep an eye on it and top it up over the next few days. When it freezes, no need to add any more water.
- Well done!
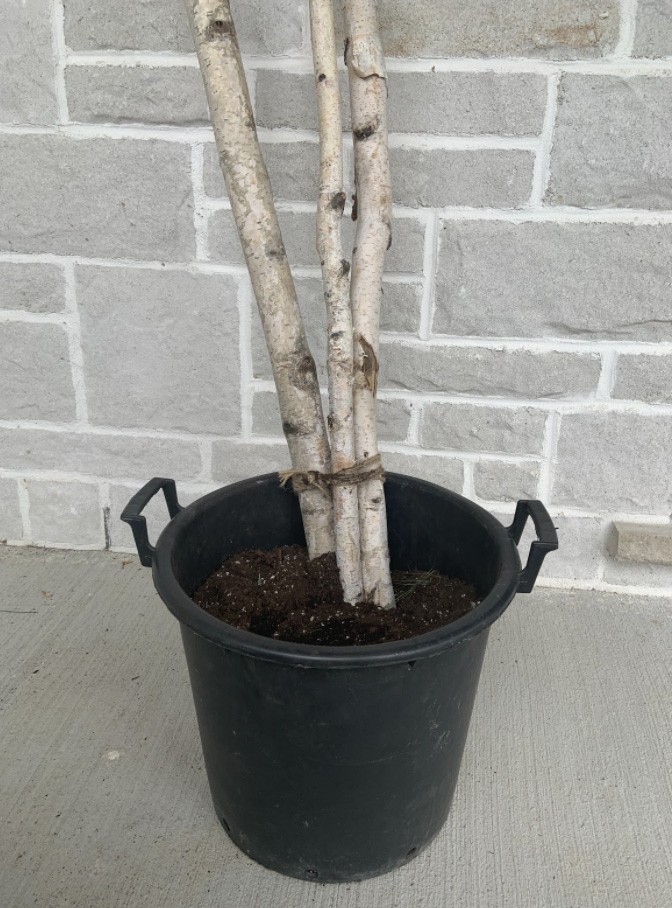 Step 7: Upsizing the Planter (optional)
- Take a pot or planter urn that is larger than the planter you just completed
- Tie together additional birch with string and place in empty pot
- Fill the larger pot approximately ½ to ¾ full with soil to hold birch in place - test how high to fill the soil by placing your completed smaller planter inside temporarily and assess how it looks, and adjust soil height accordingly
- When you have the height of soil just right, press the planter into the soil and You can even add some additional soil between the rim of the larger and smaller planters if you feel it needs securing.
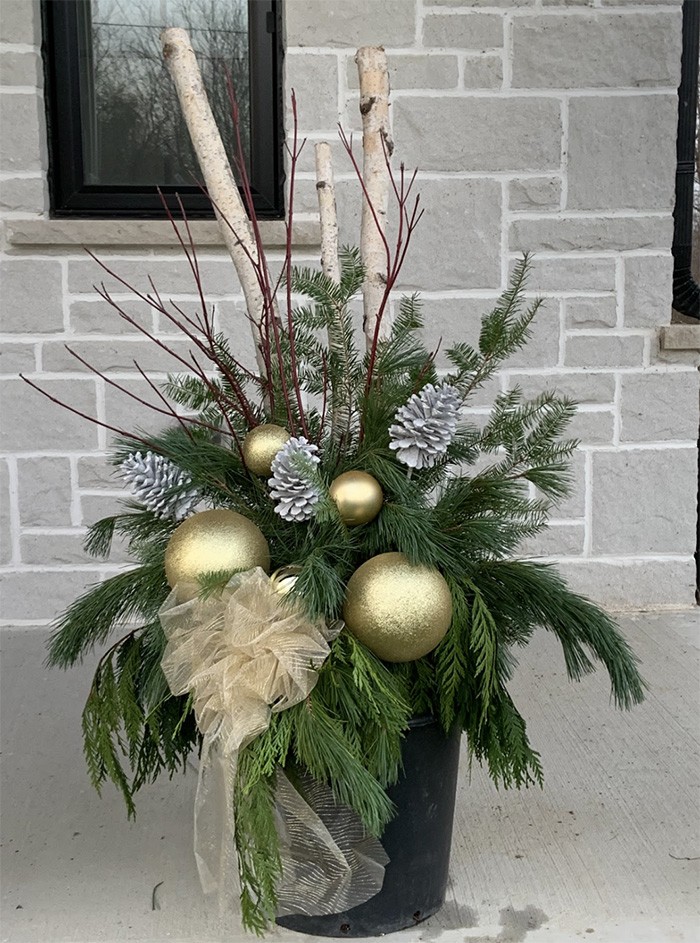 Given the greens that form the hula skirt are soft and flowy, extend the cedar over the rim of the bigger pot and it will expand the look and size of the overall planter.
And there you have it!
I’d love to see what you came up with so please send me your pics!


Oakville Office:
RE/MAX Escarpment Realty Inc., Brokerage
1320 Cornwall Road
Oakville, ON, Canada L6J 0H7
Hamilton Office:
RE/MAX Escarpment Realty Inc., Brokerage
1595 Upper James Street, Suite 101
Hamilton, ON, Canada L9B 0H7
The trade marks displayed on this site, including CREA®, MLS®, Multiple Listing Service®, and the associated logos and design marks are owned by the Canadian Real Estate Association. REALTOR® is a trade mark of REALTOR® Canada Inc., a corporation owned by Canadian Real Estate Association and the National Association of REALTORS®. Other trade marks may be owned by real estate boards and other third parties. Nothing contained on this site gives any user the right or license to use any trade mark displayed on this site without the express permission of the owner.
powered by WEBKITS
