
How to Create a Coffered Ceiling…for less than you might think!
So I explored ways to install this stunning ceiling for my home - there were many options, one technique used wood slats that were to be precisely cut and installed in box beam format on site, fully custom and fairly costly. I found a great product that came from a US company that manufactured pre-assembled pieces of straight beams and cross designs that create the intersections, which can be set into place with just a few cuts. With being Canadian and considering exchange rate, duty, customs, and shipping, these pre-assembled beams were also cost prohibitive.
So I continued my research and called contractors, researched online, visited lumber stores, met with contractors. And through those conversations and research, stumbled across an easier and affordable solution that could be done without creating wood beams, and would be a solution for the build of my new custom home, (and can also be adapted for existing homes). So with patience, this ceiling came to life. Here’s the steps we took and how you can too:
Step 1:
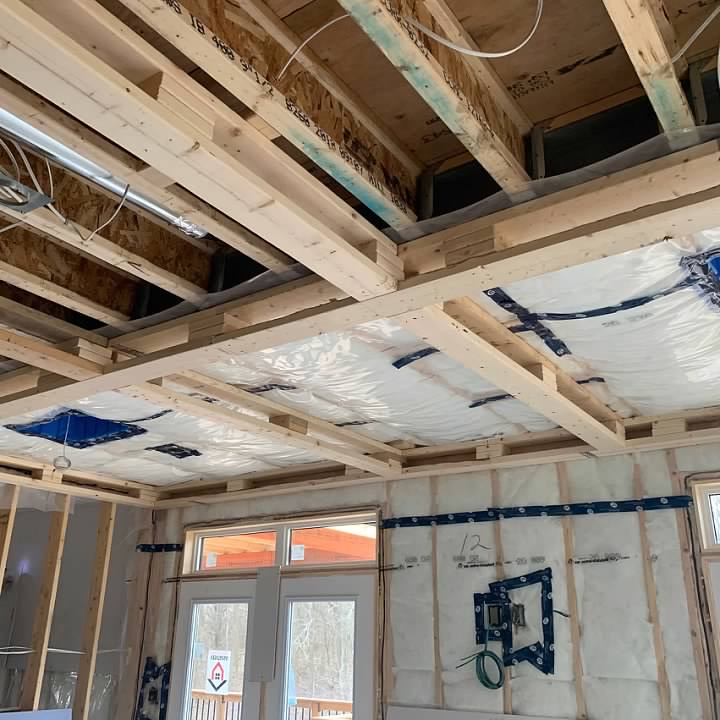
To start, map out a grid where you will place the horizontal and vertical beams - use chalkline or pencil and consider making grids equal in size or centred around a feature in the room, for example as in my case, centred with the fireplace.
If you are installing this feature on a finished ceiling, use a stud finder, and mark out the location of the studs, and design the placement of the beams, wherever possible take advantage of placing the beams into the studs.
Step 2:
And this is the start of the brilliant plan. The base of the beams are created with 2 x 6 boards. First cut 2” x 6” in 10” lengths that will be stacked together in sets of 3 to form mini posts and attached to the studs approximately every three feet. When these shorter mini posts are attached to the studs, full lengths boards are then attached to the mini posts to form the grid which becomes the base for the design and prepares for the next step.
Step 3:
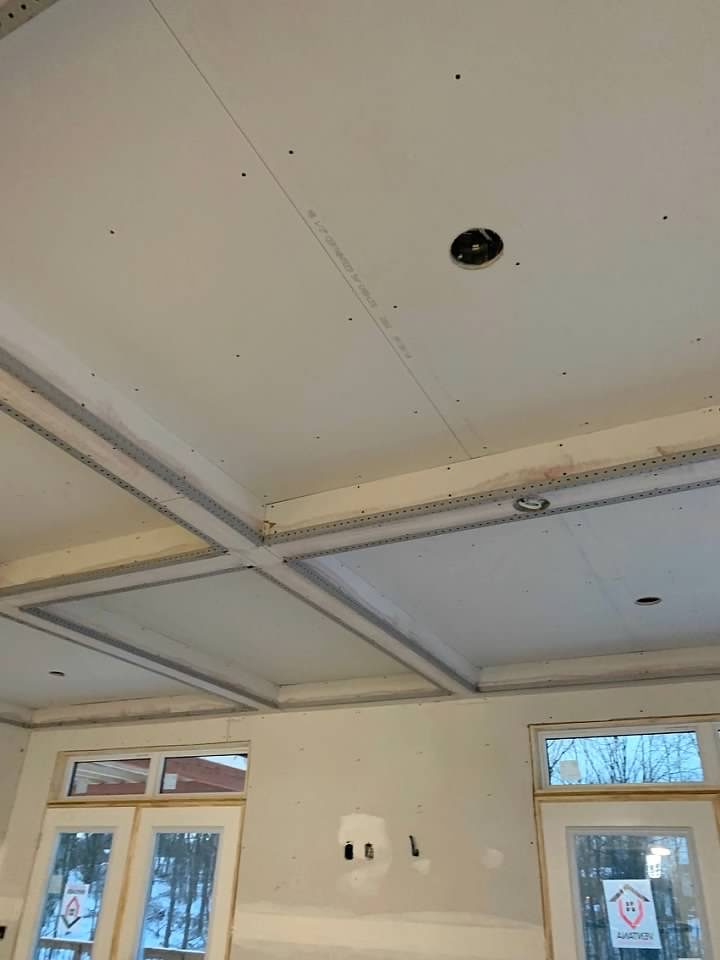
Next, and this is a big part the cost savings, the plywood grids are covered with drywall , and corner bead
Step 4:
Install drywall compound, sand, and paint with primer
Step 5:
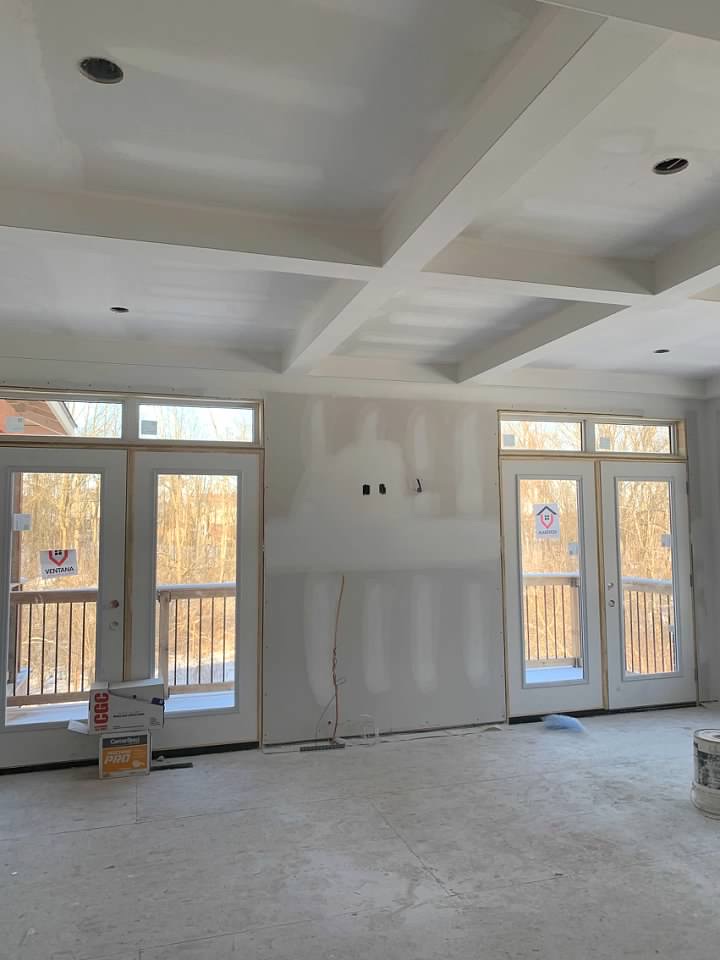
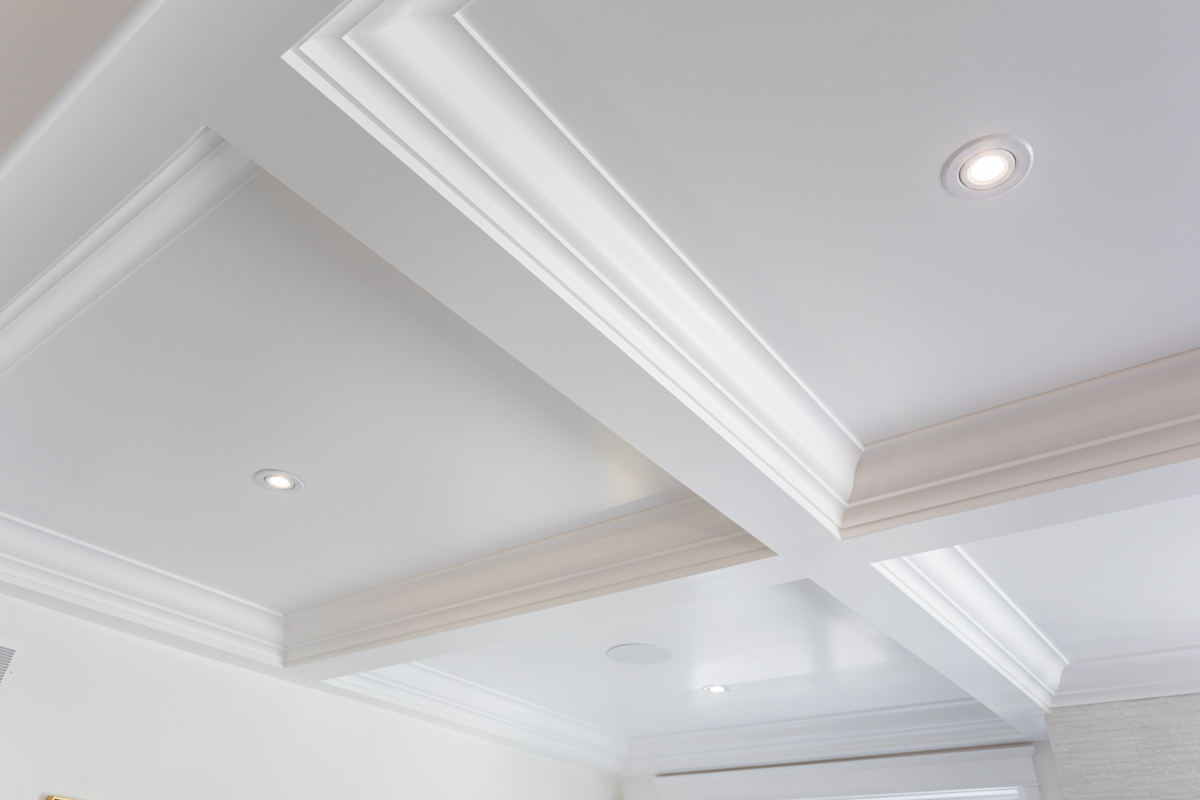
Once the beams have been primed, it is time to Install crown molding within each box. Be sure to get wide enough crown so it reaches close to the bottom edge of the drywall box.
Step 6:
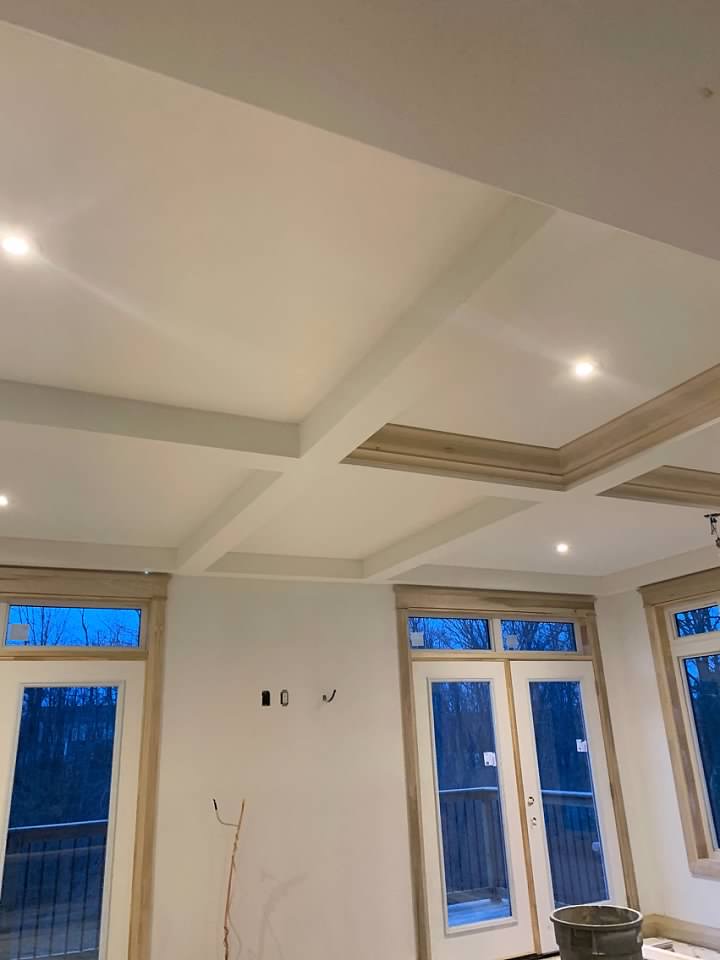
Now the final step is here to paint the ceiling including beams and trim. We used the same paint for all three surfaces to have an even cohesive look. And there you have it! Luxury ceiling at a fraction of custom wood cost!
With some research and planning, the whole project came in at roughly one third the price two quotes I received, thanks to the inexpensive 2’x6’ grid design and drywall finish over it. It provides a stunning finish to the room, that immediately adds style and higher perceived value!
If you enjoyed this blog, be sure to follow us on Instagram, Facebook and now YouTube to keep up on tips and tricks to maximize your real estate investment and help make your house a home!
Update:
To further explain the step-by-step process I have added a new video to help you through the steps.


Oakville Office:
RE/MAX Escarpment Realty Inc., Brokerage
1320 Cornwall Road
Oakville, ON, Canada L6J 0H7
Hamilton Office:
RE/MAX Escarpment Realty Inc., Brokerage
1595 Upper James Street, Suite 101
Hamilton, ON, Canada L9B 0H7
The trade marks displayed on this site, including CREA®, MLS®, Multiple Listing Service®, and the associated logos and design marks are owned by the Canadian Real Estate Association. REALTOR® is a trade mark of REALTOR® Canada Inc., a corporation owned by Canadian Real Estate Association and the National Association of REALTORS®. Other trade marks may be owned by real estate boards and other third parties. Nothing contained on this site gives any user the right or license to use any trade mark displayed on this site without the express permission of the owner.
powered by WEBKITS
